Recently, I've been seeing many bloggers sharing home renovation content, and looking at their exquisite decorations, I couldn't resist the urge to get hands-on. As a DIY enthusiast who has been obsessed with crafts since college, today I want to share some creative projects that are perfect for beginners. Honestly, when I first started DIY, I was also worried about not doing well, but after actually trying, I discovered that many seemingly sophisticated decorations aren't actually difficult.
Over the years, I've watched countless craft videos online and tried various DIY projects myself. I've had failures and surprising successes. Through continuous practice, I've identified some projects particularly suitable for beginners. These projects are not only easy to start but also produce fantastic results that can instantly elevate your room's aesthetic.
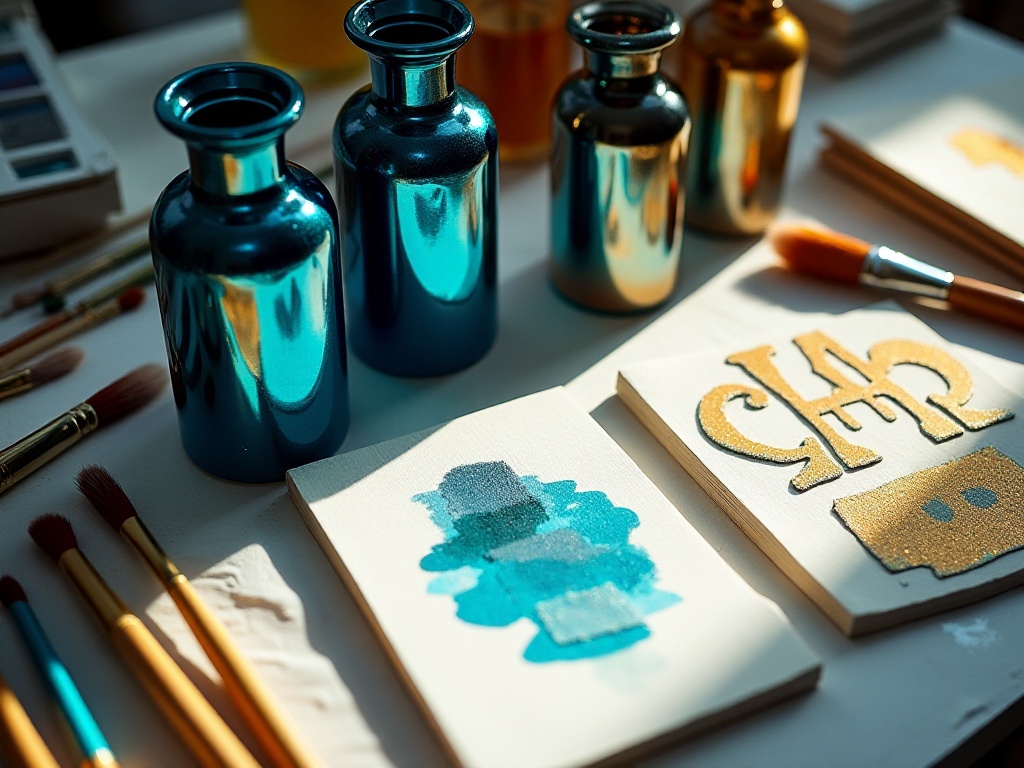
When it comes to glass bottle transformation, this is my specialty. I remember my first attempt started with an unused wine bottle. I specifically bought a set of water-based glass paints and chose several particularly gentle pearlescent colors. Before starting the creation, I spent a whole hour looking for inspiration on Pinterest and finally decided to paint a sunflower.
Paint selection is crucial, and I strongly recommend beginners start with water-based paints. Not only because they're non-toxic and eco-friendly, but more importantly, mistakes can be wiped away and redone. This "undo button" gave me the courage to try many times. The paint should be applied in thin layers, making it easier to control and creating more even colors. I discovered that painting on glass is completely different from painting on paper - you need to apply slightly more pressure for the paint to adhere evenly.
Later, I tried many different patterns, like starry skies, waves, and abstract geometric shapes. What delighted me most was when I painted an ocean using gradient blues with white foam - it looked absolutely stunning in the sunlight. When friends visited, they thought it was an art piece from some boutique design store.
This project is really addictive, and now I have a row of self-painted glass bottles at home. Some are used for flowers, others are purely decorative, and each is a unique piece of art. Recently, I've been experimenting with different shapes of glass vessels, like glasses and candleholders, all with great results.
When it comes to DIY projects that best express personality, decorative magnets definitely top the list. My refrigerator door transformed beautifully because of them. I started by making just a few, but the results were surprisingly good, and then I couldn't stop - now my fridge door is practically an art wall.
The material preparation is actually simple, mainly small wooden pieces, crystal glue, and magnet strips. But the decorative materials can be anything you imagine - I've used vintage paper, dried flowers, shells, matchsticks, and even snack wrappers. Recently, I've particularly enjoyed using vintage patterns from old magazines, paired with some dried flowers, instantly creating a French country style.
Once, I made a set of six magnets using a whole page of old newspaper, cutting different images for each one, then sealing them with crystal glue. After the glue dried, I outlined the edges with gold paint, giving them a really vintage feel. When friends visit, they're immediately drawn to this "art wall" and ask me to teach them how to make them.
Recently, I've started experimenting with epoxy resin, which allows me to embed small objects for a more three-dimensional effect. For example, I made a set of dreamy magnets using lace, dried flowers, and sequins - they look absolutely amazing on the fridge. Although the epoxy resin process is relatively more complex, requiring attention to ratios and curing time, the final results are really worth it.
When it comes to wall decoration, letter art is both trendy and easy to start with. I've recently become obsessed with creating letter decorative paintings using acrylic paint, and I've already created several pieces for myself and friends. The most popular is a piece spelling "DREAM" using gradient colors from deep purple to light pink, topped with golden sparkles - it's perfectly dreamy.
The most important aspect of creating letter art is composition. I usually design the font on the computer first, adjust the size, and print it out as a template. This ensures perfect proportions for each letter. For coloring, I particularly love using gradients within the same color family, like from forest green to mint green, or from deep blue to sky blue - this creates depth without being messy.
Once, I tried using black as a base, then outlined with silver and white to create a three-dimensional effect that looks like neon lights from a distance. Later, I added some simple plant decorations around the letters, giving it a really designed feel. Recently, I've been exploring how to incorporate watercolor effects into letter creation, using water flow to create unique textures.
The biggest advantage of this project is that it can be adjusted according to room style. For a Nordic look, use simple black and white; for Bohemian style, use vibrant color combinations; for vintage style, choose colors with an aged effect. Plus, the creation process is really stress-relieving - watching the colors gradually blend is very calming.
Speaking of rug transformation, this might be my proudest DIY project. I remember my first attempt took two whole weeks, turning all the old T-shirts I'd cleared from home into a unique rug. Though the process was a bit tiring, every time I look at this rug that contains my heart and soul, I feel a special sense of achievement.
The making process isn't actually difficult; the key is patience. I suggest first categorizing the T-shirts by color and texture. Then cut them into strips of similar width - I usually cut them about 3cm wide. Be careful to maintain uniformity while cutting, as this affects how good the weaving looks. Then comes the weaving part - I use the most basic braiding method, three strands as a group, just like braiding hair.
During the weaving process, I found that color matching is particularly important. I like using strips of the same color family in different shades - this creates a rug with depth without being too flashy. Once, I used different shades of blue and gray, and the resulting rug was practically a piece of art, instantly elevating the entire living room's style when placed there.
Recently, I've started trying some new weaving methods, like using crochet hooks, which allows for more varied patterns. I've also researched how to incorporate sequins and beads to make the rug sparkle in the light. Although these new attempts require more skill and time, the finished products are really stunning.
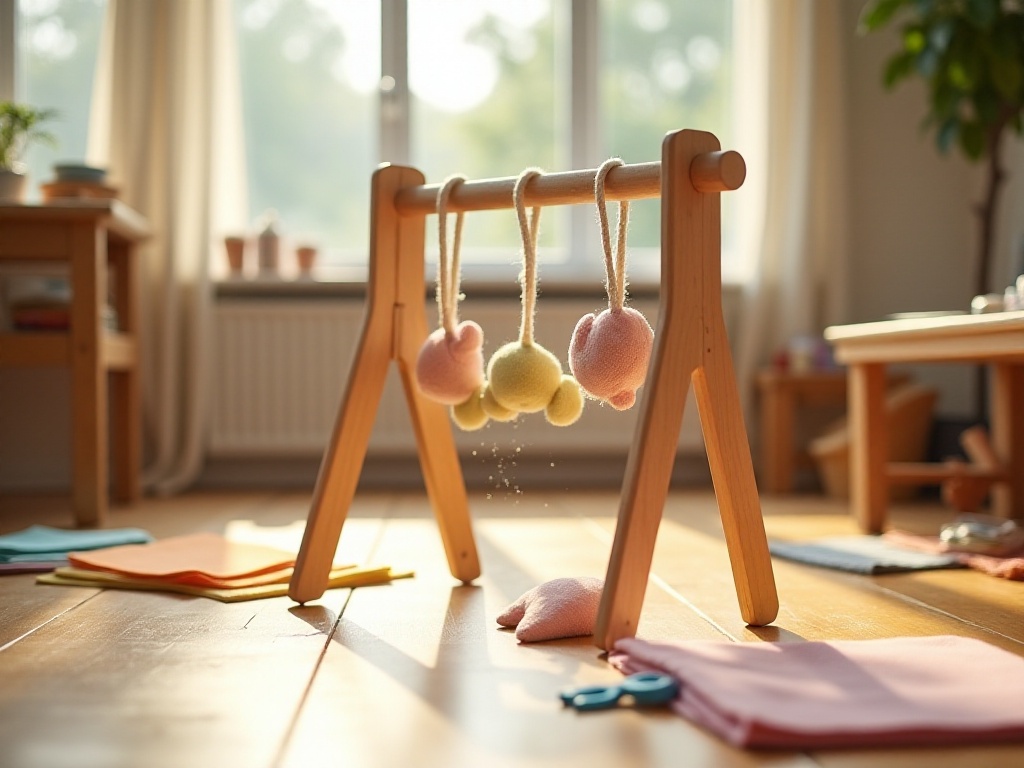
DIY baby gym is really a particularly meaningful project. When I made a baby gym for my nephew, I put in quite a lot of effort. I specifically chose some very soft fabrics and bought various small attachments. The entire making process took about two days, but seeing the baby's happy face made all the effort worthwhile.
During the making process, safety was the most important consideration. All stitching had to be especially secure, and attachments had to be guaranteed not to fall off. I used double-stitching methods to ensure every connection point was particularly solid. When choosing decorative items, I was especially careful to avoid sharp edges, ensuring all hangings were safe even if the baby grabbed them.
What surprised me most was that the homemade gym turned out to be even more popular than store-bought ones. Because you can choose toys based on the baby's interests - for instance, my nephew particularly likes animals, so I made some plush animal attachments for him. Each animal had different bells sewn inside, making different sounds when shaken, which he absolutely loved playing with.
Later, I added some interactive elements, like small pull strings, shaking bells, and fabrics of different textures. These all help develop the baby's sensory abilities and hand-eye coordination. Seeing my nephew playing so happily under the gym every day, I feel this DIY project is really meaningful.
When it comes to life tips, I can share many practical experiences. For example, regarding the issue of peanut butter separation, I've found that when using an electric mixer, special attention needs to be paid to speed control. It's best to start from the lowest setting and gradually increase speed to avoid peanut butter splashing. Also, it's better to choose a deeper container for mixing, which will be safer.
Regarding cleaning, I have many unique tricks. When dealing with stubborn grease on the oven, I mix baking soda and white vinegar into a paste and apply it to the stains. But be careful with the amount of vinegar - too much will flow everywhere. I usually use three parts baking soda to one part vinegar, mixing it into a moderately thick paste. After applying for ten minutes, wipe with a wet cloth, and even the most stubborn burnt marks can be easily removed.
For various stains on clothing, I've also developed a set of treatment methods. For paint stains, besides using professional stain removers, I've found that softening with hot water before gently brushing with a soft brush is particularly effective. However, you must be careful with water temperature - water that's too hot might damage certain fabrics. I usually test on a small corner of the garment first to confirm it's safe before using it on a larger area.
Through these DIY projects, I've truly experienced the joy of handcrafting. Each piece contains unique creativity and thoughtfulness, making ordinary life extraordinary. Most importantly, none of these require professional skills - anyone with dedication can create their own beautiful works.
I believe that DIY crafting isn't just a way to decorate homes, but a lifestyle. It teaches us to cherish the items around us, discover beauty in life, while also cultivating patience and creativity. Through my sharing, I hope more people will fall in love with DIY, and together we can use our hands to decorate life and create our own brilliance.
In the future, I will continue to explore more interesting DIY projects, trying different materials and techniques. Each attempt is a new adventure that might bring unexpected surprises. I also look forward to seeing more people sharing their DIY works, making this world richer and more colorful through our creativity.
 Previous